How To Remove Mold From Under Silicone Caulk
A Step-By-Step Guide To Remove Mold From Silicone Caulk
Mold under silicone caulk is a common problem, especially in areas with high moisture like bathrooms and kitchens. Mold can grow under the caulk when water seeps through cracks, creating a damp environment perfect for mold growth.
If left untreated, it can spread, causing damage and health issues. Proper removal and replacement of the caulk are necessary to ensure long-term protection. This guide will walk you through a step-by-step process for removing mold and applying new, mold-resistant caulk.
If the problem continues, professional mold inspection in Charlotte, NC, can find hidden mold. They can also stop future growth. Follow these steps to keep your home mold-free.
Signs That Mold Is Growing Under Your Silicone Caulk
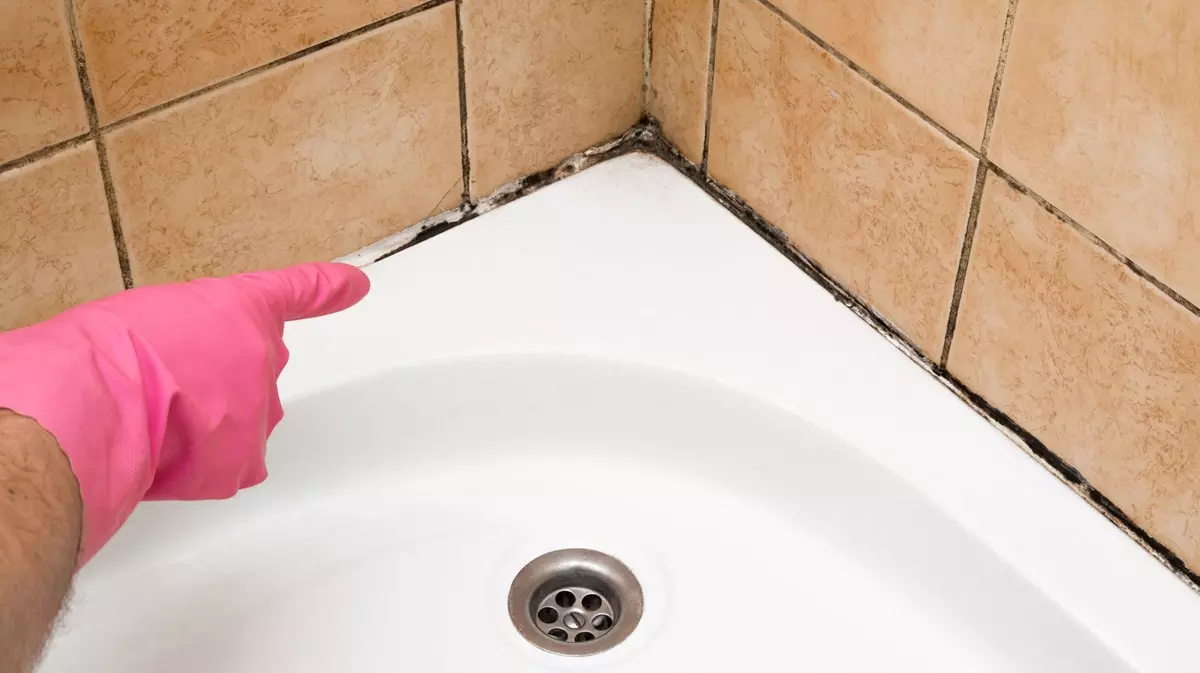
Mold under silicone caulk can be hard to detect until it becomes visible. Some common signs include black or green spots on the caulk, a musty odor, and peeling or cracking caulk.
If you notice discoloration spreading beyond the caulk, it could mean mold is growing underneath. In bathrooms and kitchens, excess moisture can make mold worse.
If cleaning the surface does not remove the stains, mold may be deep under the caulk. In such cases, getting a mold inspection Charlotte NC can help determine the extent of the problem. Identifying mold early can prevent costly damage and keep your home safe.
Step 1: Gather The Necessary Supplies
Before you start, gather all the tools and cleaning materials needed for the job. You will need a utility knife, rubbing alcohol, bleach, hydrogen peroxide, baking soda, a scrubbing brush, and paper towels.
A mold-resistant silicone caulk and a caulking gun will also be required for reapplication. Mold can be stubborn, so using the right products will ensure complete removal.
If the mold problem is widespread, consider hiring a mold removal service Charlotte NC to handle the issue professionally. Good preparation makes mold removal easy and effective. This helps avoid having to clean again.
Step 2: Remove The Old Silicone Caulk
Removing the old caulk is crucial because mold hides underneath it. Use a utility knife or a razor blade to cut along the edges of the caulk. Carefully peel it away with your fingers or tweezers.
If the caulk is too tough, applying a caulk remover will soften it, making removal easier. Be patient and ensure all caulk residue is removed before proceeding.
Once the old caulk is gone, inspect the area for any hidden mold spots. A professional mold remediation Charlotte NC service can help if the mold has spread beyond the surface. A clean surface is essential before applying new caulk.
Step 3: Clean And Disinfect The Moldy Area
After removing the caulk, clean the exposed area thoroughly. Mix equal parts of bleach and water or use hydrogen peroxide to kill mold spores. Apply the solution and let it sit for at least 15 minutes before scrubbing with a toothbrush or scrubbing brush.
This step ensures all visible mold is eliminated. For extra protection, wipe the area with vinegar or rubbing alcohol. If mold stains remain, repeat the process.
Mold can be persistent, so thorough cleaning is necessary. If mold keeps coming back, schedule a mold inspection Charlotte NC to identify the root cause and get professional assistance.
Step 4: Let The Surface Dry Completely
Moisture is the main reason mold grows under silicone caulk. Before reapplying new caulk, make sure the cleaned area is completely dry. Use a fan or open windows for ventilation.
Drying the surface prevents moisture from getting trapped under the new caulk. Any remaining moisture can cause mold to return quickly. If you live in a humid environment, a dehumidifier can help remove excess moisture.
Waiting at least 24 hours before applying new caulk ensures a strong and long-lasting seal. Proper drying also makes it easier for the new caulk to adhere to the surface, providing better protection against future mold growth.
Step 5: Apply New Mold-Resistant Silicone Caulk
Now that the area is clean and dry, it’s time to apply new caulk. Use a high-quality mold-resistant silicone caulk to prevent future mold problems. Load the caulk into a caulking gun and apply a smooth, even bead along the edges.
Use a caulking tool or your finger to press it down and seal the gap. Make sure there are no gaps where moisture can seep through. Allow the caulk to dry for at least 24 hours before using the area. If mold problems continue, contact a mold removal service Charlotte NC to ensure the area is fully treated and protected.
Prevention Tips To Keep Mold From Coming Back
Keeping mold away requires regular maintenance and proper ventilation. Always dry surfaces after using the sink or shower to prevent moisture buildup. Clean the caulk regularly with a vinegar solution to stop mold from forming.
A bathroom fan or open windows can help reduce humidity. If you notice mold forming despite your efforts, get a mold remediation Charlotte NC service to inspect for deeper issues.
Using mold-resistant products and keeping the area dry will help keep your home mold-free. A little prevention goes a long way in avoiding costly repairs and health risks associated with mold exposure.
Keep Your Home Fresh And Mold Free
Mold under silicone caulk is a common but manageable issue. To keep mold away for good, follow these steps: remove old caulk, clean well, and apply new mold-resistant caulk.
Regular maintenance and good ventilation are key to preventing future mold growth. If mold continues to return, a mold inspection Charlotte NC can help identify hidden issues.
For serious cases, professional mold remediation in Charlotte, NC will fix the problem fully. Taking these steps will keep your home clean, safe, and mold-free. Don't ignore mold act quickly to protect your health and property.