How to Prepare Your Home for a Plumbing Inspection
Preparing for a plumbing inspection is one of the smartest things a homeowner can do to avoid costly repairs and ensure their system runs efficiently. Whether you are scheduling routine maintenance, selling your property, or facing recurring plumbing issues, getting your home ready beforehand can save both time and money.
What You Should Know is that trusted Plumbers in Hawthorne, CA often emphasize the importance of preparation, as it allows them to conduct a thorough and accurate inspection without unnecessary delays.
Why Plumbing Inspections Matter
A plumbing inspection is more than just a quick look at your pipes. It is a detailed evaluation of your water supply lines, drains, fixtures, water heater, and sewer system. Inspectors search for leaks, blockages, corrosion, and potential safety hazards. By identifying small problems early, you can prevent serious damage like burst pipes, mold growth, or water contamination.
Regular inspections also help maintain your home’s value. If you ever decide to sell, proof of a well-maintained plumbing system can be a strong selling point.
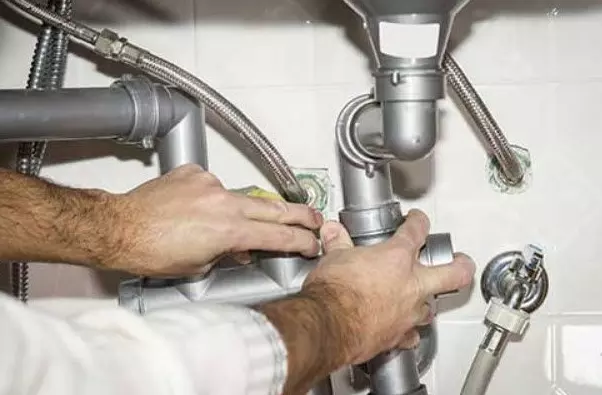
Step 1: Clear Access to Plumbing Fixtures
The first step in preparing your home is to ensure that all areas of your plumbing are easily accessible. Inspectors will need to check sinks, toilets, bathtubs, water heaters, and shut-off valves. If furniture, storage boxes, or other household items block these fixtures, move them ahead of time.
- Clear out items under sinks.
- Make sure water heater closets are accessible.
- Clear pathways to crawl spaces or basements if applicable.
This small effort speeds up the inspection process and ensures nothing important gets overlooked.
Step 2: Check for Obvious Issues
Before the plumber arrives, take a few minutes to look over your system. While you may not catch everything, you can make note of visible issues that need attention.
Look for:
- Leaking faucets or showerheads
- Constantly running toilets
- Slow drains in sinks or tubs
- Signs of moisture around pipes or walls
- Unusual noises when running water
By pointing out these issues during the inspection, you help the plumber focus on problem areas while still completing the full evaluation.
Step 3: Test Water Pressure and Flow
Low water pressure may indicate hidden leaks, sediment buildup, or problems with the main water line. Before the inspection, turn on multiple faucets at once to see how your water pressure holds up.
If you notice weak pressure or fluctuating flow, make a note for the plumber. This step helps them pinpoint whether the issue comes from fixtures, pipes, or the municipal supply line.
Step 4: Prepare Outdoor Plumbing
Many homeowners forget that plumbing inspections include outdoor components such as hose bibs, irrigation lines, and sewer clean-outs. To prepare:
- Remove garden tools or clutter from around outdoor faucets.
- Ensure the main sewer clean-out cap is visible and not buried under soil or landscaping.
- Check for leaks in irrigation systems or standing water in the yard.
These steps give inspectors an easier time assessing the full scope of your plumbing system.
Step 5: Gather Relevant Documentation
If you have records of previous plumbing repairs, warranties, or recent water bills, keep them handy. This information helps the inspector understand your home’s plumbing history and spot patterns like rising water usage, which may indicate hidden leaks.
Providing documentation can also save you money in the long run, as it prevents unnecessary repeat work.
Step 6: Be Ready with Questions
A plumbing inspection is not just about finding problems—it’s also your opportunity to learn more about your home’s system. Prepare a list of questions such as:
- What areas of my plumbing system should I monitor most closely?
- How often should I schedule inspections?
- Are there upgrades or replacements I should consider soon?
- What maintenance tasks can I do on my own?
Asking questions gives you practical knowledge and confidence in maintaining your system between inspections.
Step 7: Plan for Access to Water Shut-Offs
Inspectors may need to test or examine your home’s shut-off valves. Ensure the main water shut-off valve is clearly visible and not blocked by storage. Knowing how to operate this valve is also crucial in emergencies.
You may also want to turn off water-using appliances, like dishwashers and washing machines, before the inspection to avoid interruptions.
Step 8: Address Safety and Hygiene
Plumbers sometimes work in tight, dusty, or damp areas of your home. A little preparation can make their job easier and safer.
- Wipe down areas around sinks and toilets.
- Remove any hazardous cleaning chemicals from under sinks.
- Ensure crawl spaces or basements are dry and free of pests.
These small steps not only create a safer working environment but also allow for a smoother inspection process.
Common Findings in Plumbing Inspections
During an inspection, plumbers often identify recurring issues that homeowners might not notice:
- Aging water heaters that need replacement
- Corroded or outdated piping materials
- Blocked drains or sewer lines
- Improperly installed fixtures
- Water pressure irregularities
By preparing for the inspection, you increase the chances that these issues will be discovered before they cause expensive damage.
Final Thoughts
Preparing your home for a plumbing inspection does not take much effort, but the benefits are substantial. Clear access, basic checks, and documentation all help inspectors do their job thoroughly and efficiently. What You Should Know is that inspections are preventative measures—catching small leaks or inefficiencies early saves you from future emergencies and high repair costs.
For residents who want peace of mind and expert service, working with experienced Plumbers in Hawthorne, CA ensures that inspections are detailed, accurate, and followed by practical recommendations. With proper preparation and professional oversight, your home’s plumbing system can remain reliable for years to come.