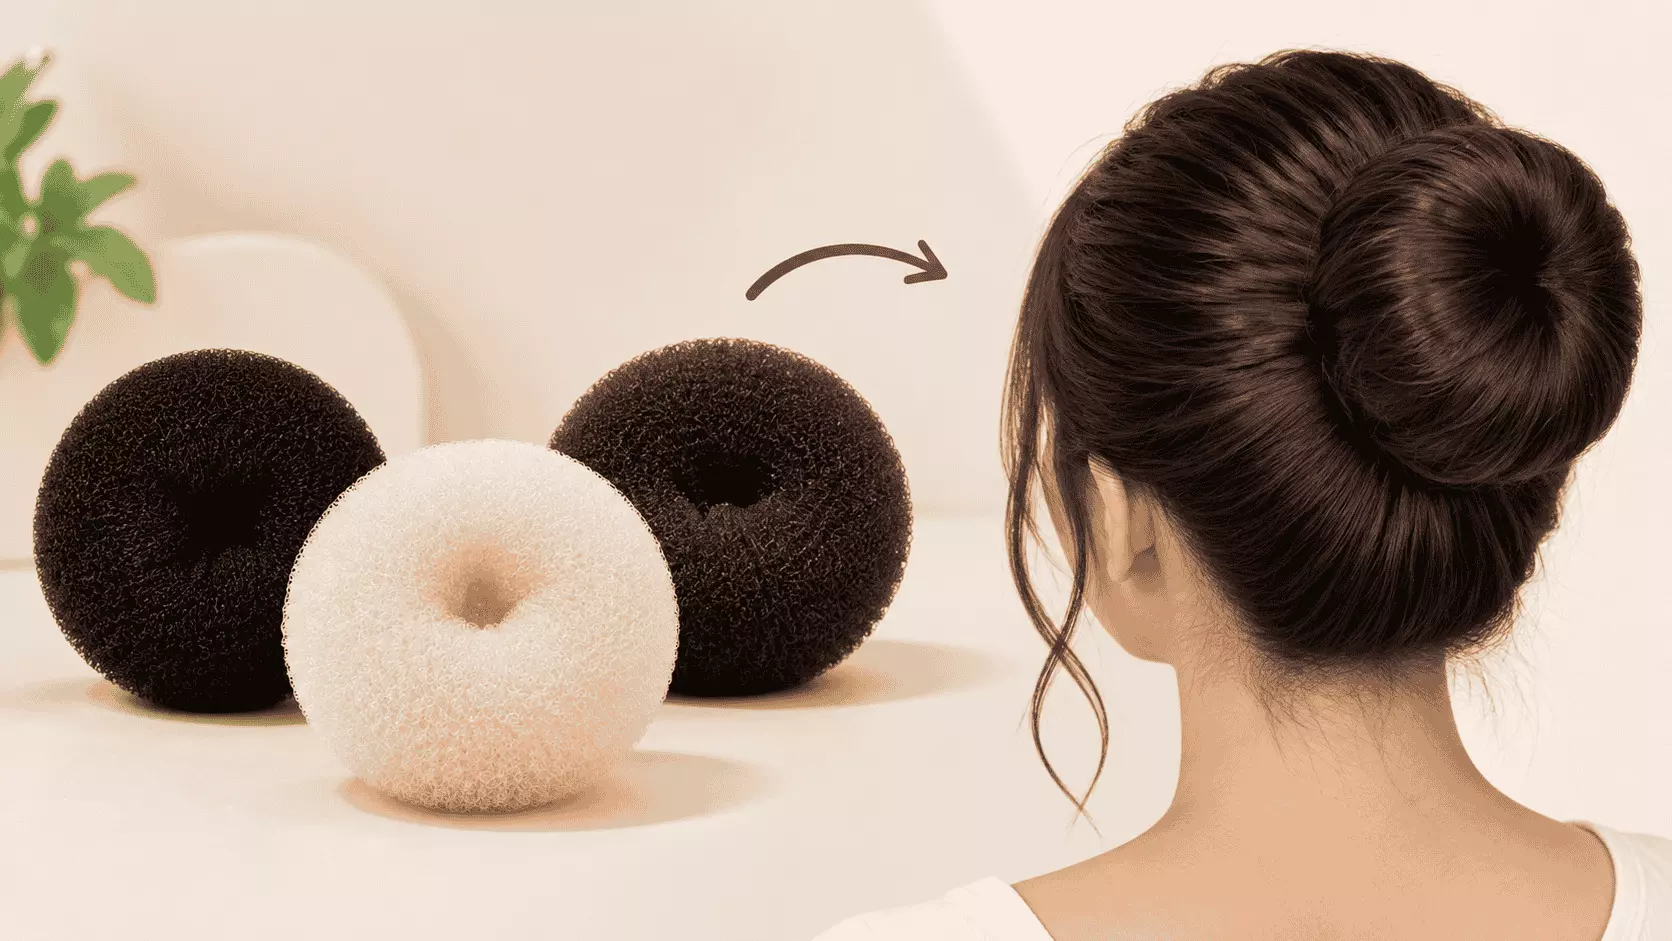
7 Powerful Ways to Create a Voluminous Bun on Thin Hair!
Creating a voluminous bun on thin hair can feel a little tricky. You make the bun, look in the mirror, and somehow it still looks smaller than you imagined.
The good news? You do not need extremely thick hair to get a fuller-looking bun. With the right technique, a bun maker for thin hair, and a few simple hair bun accessories, you can create a hairstyle that looks much bigger and stays in place.
The trick is not to pile everything into one tight knot. Instead, you build the shape step by step.
So, how do you make thin hair look fuller without making the bun messy or uncomfortable? Let’s break it down.
1. Start With the Right Hair Preparation
The way your hair feels before you make the bun can change the final result.
Freshly washed hair often feels too soft and slippery. That can make pins slide out and make the bun lose its shape.
If possible, work with hair that is at least a day old.
Before styling:
- Brush your hair gently to remove knots.
- Apply a small amount of lightweight texturizing spray.
- Avoid heavy oils or serums before creating the bun.
- Add a little dry shampoo at the roots if your hair feels too flat.
- Backcomb the crown lightly if you want extra height.
Do not go overboard with products. Too much product can weigh thin hair down.
A little texture is usually enough.
2. Choose a Bun Maker for Thin Hair
A bun maker can make a big difference when your natural ponytail does not have much volume.
A bun maker for thin hair gives your hair something to wrap around. Instead of relying only on your own hair to create the size, you can build the bun around the accessory.
Look for a bun maker that:
- Matches your hair colour
- Feels lightweight
- Has a soft or flexible texture
- Does not show through the hair
- Is small enough for your hair length
Large bun forms can sometimes create an obvious gap between your hair and the accessory. For thin hair, a smaller form often looks more natural.
You can also use a small donut and wrap your hair around it evenly.
The goal is simple. You want the accessory to support your hair, not become the most noticeable part of the hairstyle.
3. Create a High Ponytail With a Little Lift
Where you place your ponytail matters.
For a classic bun, gather your hair around the crown or slightly below it. Secure it with a strong but comfortable elastic.
Before tightening the ponytail completely, gently pull a few sections around the crown.
This creates a little lift.
You can also use the following trick:
- Tie your ponytail.
- Hold the base with one hand.
- Use the other hand to gently pull small sections upward.
- Stop once you get the amount of height you want.
Do not pull the entire ponytail loose. You only need a little extra space around the roots.
This small step can make the finished hairstyle look much fuller.
4. Divide Your Hair Before Wrapping It
This is one of the easiest ways to make thin hair look thicker.
Instead of wrapping your entire ponytail around the bun maker at once, divide the ponytail into two or three sections.
Then work with each section separately.
For example:
- Take the first section and spread it over the bun maker.
- Secure it underneath with a bobby pin.
- Take the second section and wrap it around the exposed area.
- Add the final section around the base.
- Tuck the ends underneath.
Why does this help?
It gives you more control over the shape. You can spread each section evenly instead of creating one thick-looking strip of hair on one side.
Take your time here. A few extra minutes can make the bun look much more balanced.
5. Use Hair Bun Accessories to Add Shape
You do not need dozens of accessories. A few well-chosen pieces are enough.
Useful hair bun accessories include:
- U-pins
- Bobby pins
- Small clear elastics
- Decorative hair pins
- Small bun forms
- Hair nets
- Sectioning clips
U-pins are especially useful for buns because they can hold larger sections without making the hairstyle look overloaded with pins.
A hair net can also help if your hair is very fine. Choose one close to your hair colour and stretch it gently over the bun. Then tuck the edges underneath.
For weddings or festive occasions, you can add decorative pins after the basic bun is secure.
This works well because the decoration comes last. You first build the shape, then dress it up.
6. Make the Bun Look Bigger Without Making It Loose
This part needs a little care.
If you simply pull the bun apart, it may look larger for five minutes and then start falling apart.
Instead, loosen the surface gradually.
Once the bun is secured:
- Pull tiny sections outward.
- Start from the sides.
- Move around the bun instead of pulling one large section.
- Check the shape from the front and sides.
- Add pins wherever the bun feels loose.
You can also gently spread the wrapped hair with your fingertips.
Think about the shape you want before you start pulling.
Do you want a round bun? A slightly wider bun? A soft bridal bun?
The answer will decide where you add volume.
7. Finish With the Right Hold
- Thin hair can lose shape quickly, especially in humid weather.
- A light-hold hairspray can help keep everything together without making the hair stiff.
- Hold the spray a little away from your hair and apply a small amount.
- You can also spray a little onto a clean toothbrush or small styling brush and smooth flyaways around the bun.
- This gives you more control than spraying a large amount directly onto the hairstyle.
- For Indian weddings, this can be especially useful because hairstyles may need to last through several hours of sitting, walking, photographs and dancing.
How to Make a Voluminous Bun on Very Thin Hair
- If your hair is extremely fine, you may need an extra step.
- Try creating two small ponytails instead of one.
- Place one slightly above the other. Then use the upper ponytail to create the main shape and wrap the lower section around the base.
- This gives the bun more structure.
- Another option is to create a small twisted base before placing your bun maker.
- You can also backcomb the ponytail lightly before wrapping it.
- Just remember that aggressive teasing can cause unnecessary pulling and breakage. Use a fine-tooth comb gently and work in small sections.
Best Hair Bun Accessories for Different Bun Styles
The accessory you choose should match the style you want.
For a simple everyday bun
Use:
- Small bun maker
- Bobby pins
- Soft elastic
This keeps the hairstyle quick and comfortable.
For a bridal bun
Use:
- Bun maker
- U-pins
- Hair net
- Strong bobby pins
- Decorative pins
- Flowers or jewellery pieces
A bridal bun usually needs more support because accessories can add weight.
For a messy bun
Use:
- Small bun form
- Texturizing spray
- Bobby pins
- A few decorative clips
Keep the sections loose and uneven instead of trying to make every strand perfect.
Common Mistakes to Avoid
Even a good bun maker will not solve every styling problem.
Avoid these common mistakes:
Using a bun maker that is too large
If the accessory is much bigger than your natural hair volume, you may struggle to cover it.
Pulling the hair too tightly
A very tight ponytail may give you a neat shape, but it can also make the hair look flatter around the scalp.
Using too much oil
Oily hair can become slippery and difficult to secure.
Adding accessories before securing the bun
Always build the bun first.
Then add decorative pieces.
Putting all the volume at the top
A balanced bun needs volume around the sides and back too.
How Long Can a Voluminous Bun Last?
With good preparation, the hairstyle can last several hours.
The exact time depends on your hair texture, humidity, movement and the products you use.
For an event, test the hairstyle before the actual day.
Wear it for a few hours at home.
Move around.
Sit down.
Take a few photos.
Then check whether the bun still feels secure.
This simple test can tell you where you need extra pins or a smaller bun maker.
Quick FAQ About Buns for Thin Hair
Can thin hair make a big bun?
Yes. A bun maker, proper sectioning and light teasing can create the appearance of much more volume.
What is the best bun maker for thin hair?
A small, lightweight bun form that closely matches your hair colour usually works well. The accessory should be easy to cover with your natural hair.
How do I make my bun look fuller?
Create texture first, divide your ponytail into sections, spread the hair evenly around the bun maker and gently pull small sections outward after securing the bun.
Can I wear a bun maker every day?
Yes, as long as the hairstyle does not pull tightly on your scalp and the accessory feels comfortable. Give your hair breaks from tight hairstyles when possible.
Which hair bun accessories help thin hair?
U-pins, bobby pins, small bun forms and hair nets are useful. Decorative accessories can also add visual interest without requiring more natural hair volume.
How do I stop a bun from falling?
Use a secure elastic at the base, place pins around the bun rather than only in one spot, and finish with a light layer of hairspray.
The Simple Formula for a Fuller Bun
- You do not need naturally thick hair to create a beautiful bun.
- Start with texture.
- Add a suitable bun maker for thin hair.
- Divide your ponytail into sections.
- Spread the hair evenly.
- Secure it with the right hair bun accessories.
- Then gently shape the finished bun.
- That is really the whole idea.
The next time your hair feels too thin for the bun you have in mind, do not immediately give up on the hairstyle. Change the technique first. A few small adjustments can make a surprisingly big difference.